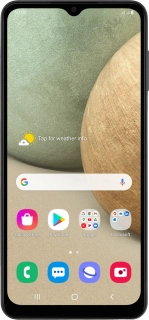
![Samsung Galaxy A12](http://wmstatic.global.ssl.fastly.net/ml/7140723-f-b1345286-2cdd-4867-b10e-3299544260db.png?width=150&height=320)
Samsung Galaxy A12
Android 10.0
1 Find "Accounts"
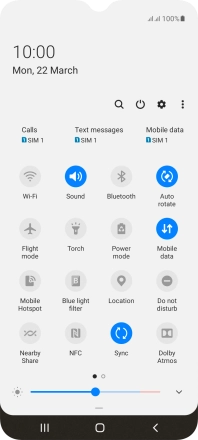
Slide two fingers downwards starting from the top of the screen.
![](http://wmstatic.global.ssl.fastly.net/ml/7140723-f-57c6043a-b9e4-4e32-9587-52130c062072.png?width=198&height=444)
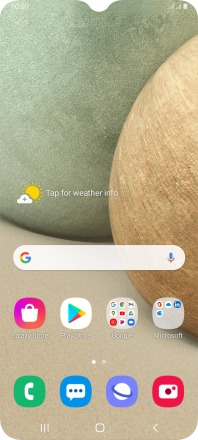
Press the settings icon.
![](http://wmstatic.global.ssl.fastly.net/ml/7140723-f-82d999c2-5484-4a11-b35e-f182512a9e1e.png?width=198&height=444)
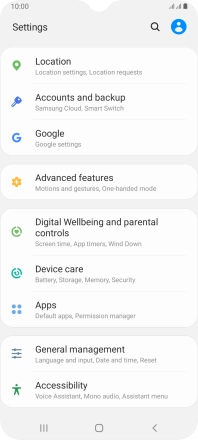
Press Accounts and backup.
![](http://wmstatic.global.ssl.fastly.net/ml/7140723-f-845fac07-78dd-43ef-82ee-780cac0c06e6.png?width=198&height=444)
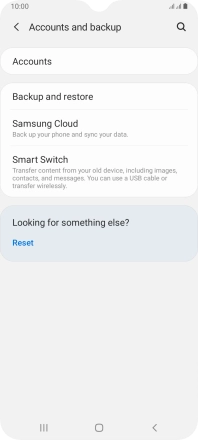
Press Accounts.
![](http://wmstatic.global.ssl.fastly.net/ml/7140723-f-487aabcf-adf0-4c0c-a7da-574ec1121d40.png?width=198&height=444)
2 Turn automatic synchronisation of content on or off
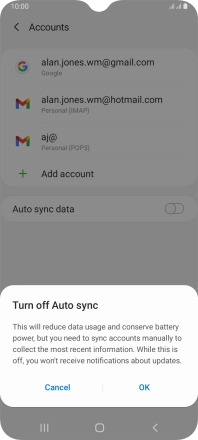
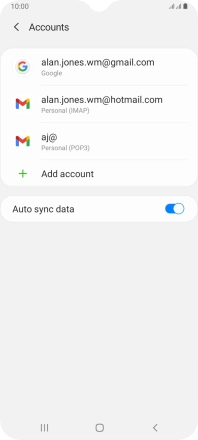
Press the indicator next to "Auto sync data" to turn the function on or off.
![](http://wmstatic.global.ssl.fastly.net/ml/7140723-f-0fd8ac11-5412-49be-9c67-bf5cdf1b57b5.png?width=198&height=444)
Press OK.
![](http://wmstatic.global.ssl.fastly.net/ml/7140723-f-2aeab396-cf27-4264-bf4d-a0ba56df2554.png?width=198&height=444)
3 Return to the home screen
Press the Home key to return to the home screen.
![](http://wmstatic.global.ssl.fastly.net/ml/7140723-f-0fd8ac11-5412-49be-9c67-bf5cdf1b57b5.png?width=198&height=444)